Tutorial Time: Adjusting Brightness and Contrast Using Photoshop
Sarah Corley#Design Advice, #Tutorials

We share step-by-step instructions for using Photoshop to find the perfect levels of brightness and contrast in your images.
Have you ever taken what you thought would be a great photo to use for your marketing materials, only to find that it didn’t turn out like you expected, with the lighting causing details to get lost in the shadows? We can’t all be professional photographers, but luckily, Photoshop gives us the tools to take these photos and adjust brightness and contrast to bring them more in line with our expectations.
As part of our continuing series of tutorials, we wanted to look at how to use Photoshop to find the brightness and contrast settings that will bring out the best in your images. Let’s get started:
Brightness/Contrast in Photoshop
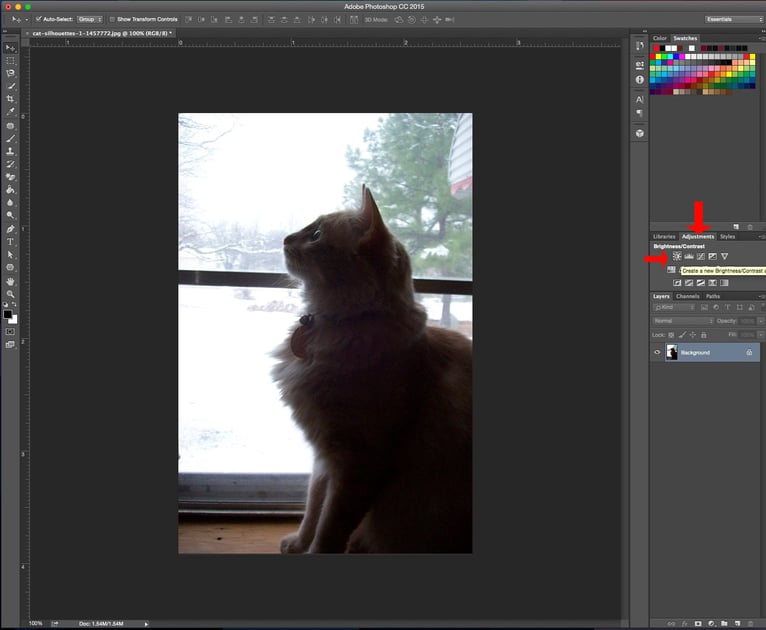
- Open your picture in Photoshop and navigate to the Adjustment tab on the far right hand side. Click on the sun icon. This is the Brightness and Contrast Tool. By clicking this tool, you are adding an adjustment layer, which applies color and tone adjustments without permanently changing your picture/pixels. This extra layer means that it’s fully editable, and if necessary, you can delete it and revert to your original image.
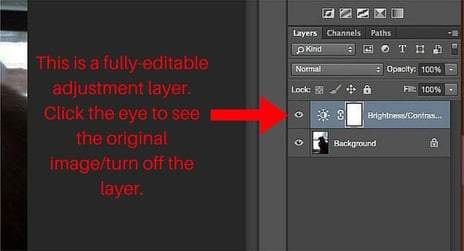
- As you can see in the Brightness/Contrast pane, each option can be adjusted either up or down. The brightness setting determines the level of overall lightness or darkness of the image, while contrast is the difference between the lightest part and the darkest part of an image. Play with the Brightness/Contrast arrows in tool to change the image’s settings.
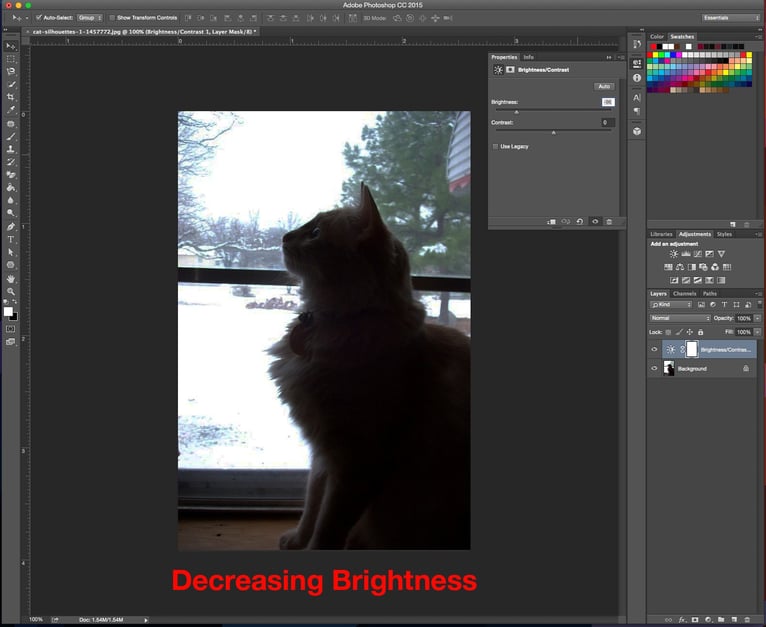
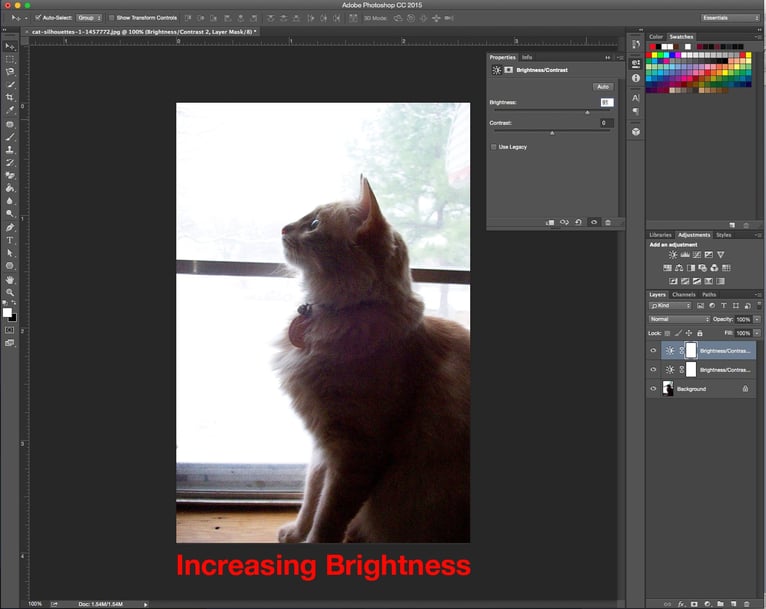
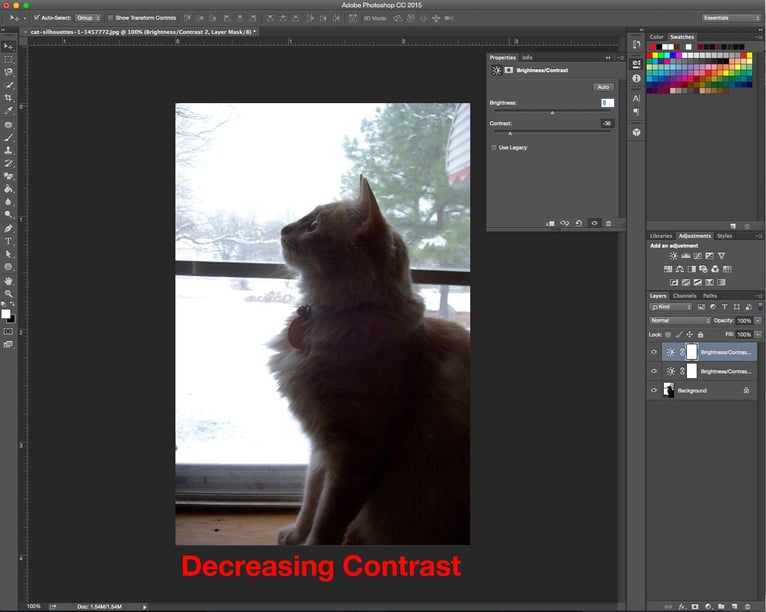
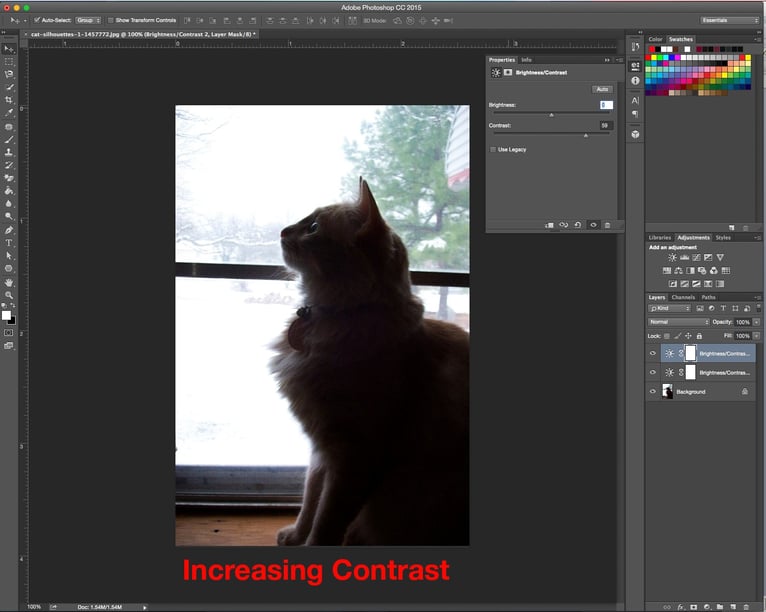
- The magic begins when you start to combine brightness and contrast levels to find the settings that bring out the details you want to highlight in your images. At this point, it becomes a matter of personal taste as to what you think looks good and is most natural.
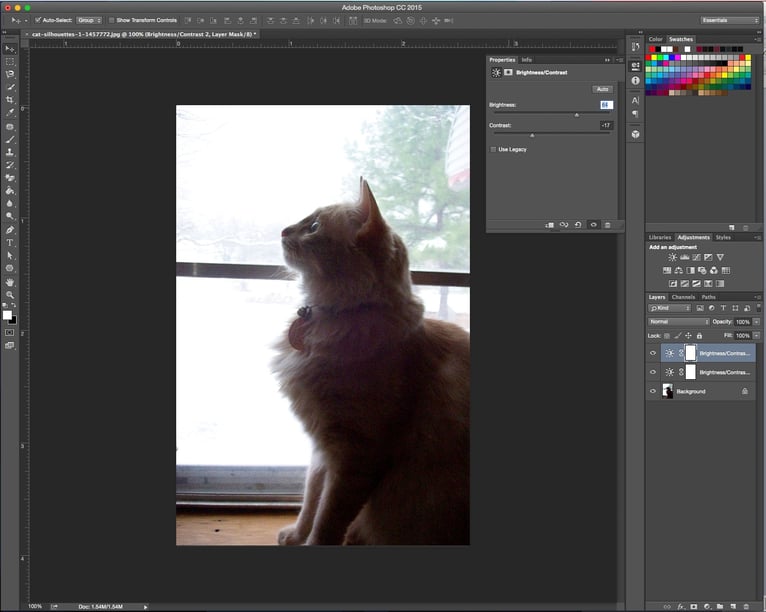
That’s it for our quick overview of the Brightness and Contrast tool in Photoshop, but stay tuned for more upcoming tutorials. Do you have any Photoshop tips and tricks you’d like to share? Please post them in the comments below!
Related Posts
Accessibility Playbook Resources
Useful accessibility resources that are free for web designers, web developers, and content creators to help them build more inclusive websites.

Generative Engine Optimization (GEO): Creating Content For AI-Search
Generative Engine Optimization (GEO) boosts your content's visibility in AI search. Discover 5 key strategies for platforms like Perplexity and Gemini.
Results Matter.
We design creative digital solutions that grow your business, strengthen your brand and engage your audience. Our team blends creativity with insights, analytics and technology to deliver beauty, function, accessibility and most of all, ROI. Do you have a project you want to discuss?
Like what you read?
Subscribe to our blog "Diagram Views" for the latest trends in web design, inbound marketing and mobile strategy.
