How to Move Your WordPress Site to a cPanel Account
Mark Millette#Hosting

Learn how to take advantage of Linux hosting with a cPanel control panel for your WordPress site with this step by step migration guide.
As we’ve mentioned before, a Linux server that uses a cPanel control panel provides some excellent tools for managing the hosting of your website. But what if you already have a WordPress site that you would like to host on a cPanel-managed server? As with most software migrations or updates, there are several possible ways to accomplish your goal, but I’ve come up with a process that makes the migration simple and manageable. You can follow the step-by-step process below to complete the migration yourself.
In this scenario, there are a couple assumptions before we proceed:
- You have a cPanel account and Login information.
- You have SSH access to your new cPanel account.
My current Installation:
As an example for this migration, I will start with a very simple site called wptest, which currently resides on a XAMPP stack internal Linux server. The folder structure may vary from site to site; my current folder path is:

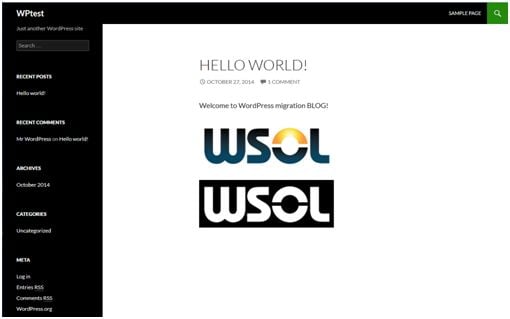
Before migrating the site, we need to backup all site files and the current MySQL database from the original site. There are several tools available to create this backup, but for this example, we will load a plugin called BackupWordPress.
Install backup plugin for WordPress and back up site files and database:
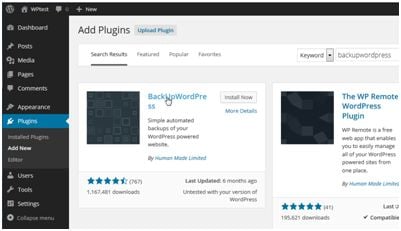
First, let’s search for and install the plugin. Log in to your WP-Admin page and go to Plugins. Next, click on Add New, and in the search section, type BackupWordPress.

Select the plugin and click Install. Don’t forget to activate the plugin afterwards.
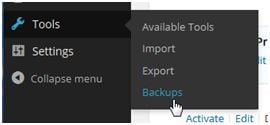
After the plugin has been loaded and activated, go to Tools/Backups to run it for the first time.
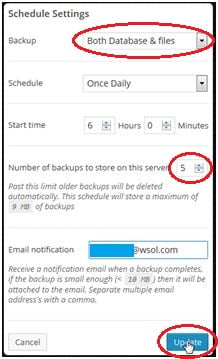
We will want to adjust the default settings from just backing up the Database to Both Database and Files. Click Update after selecting these settings.
Click Run now to create the backup.
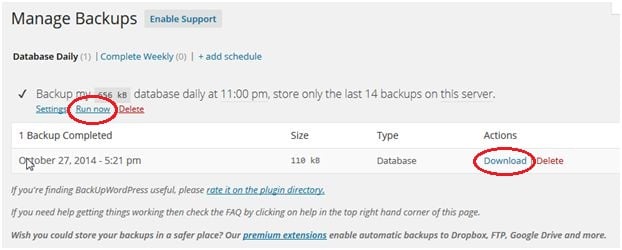
After backup completes and verifies the files and database, click Download to save a local copy. The backup plugin will maintain the number of copies specified in the site root folder on your server in a folder called:

In the folder called backupwordpress-xxxxxxxxxx-backups (the actual folder name may vary), you will find the zip files of your backups.
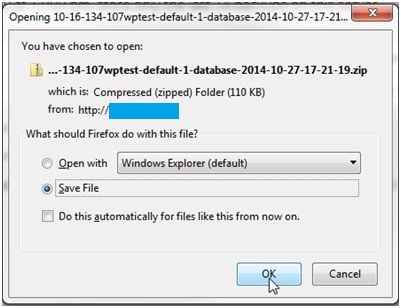
After you download the file, you can extract the file to verify that it contains all your content.
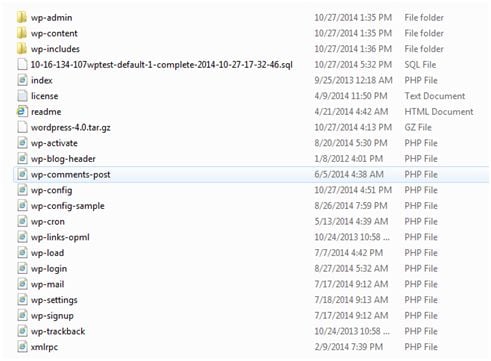
Migration to cPanel Account:
Now that we have the backup files, it is time to migrate to our new cPanel account. You should already have an account and proper domain configured beforehand. In this example, we are using wptest.wsolutions.net as our new site, and I have verified my account and password for login.
In cPanel, we will pre-install our WordPress site and overwrite that site with our backup files later.
First, load WordPress on your cPanel account. Under “Software/Services” select site software:

Select WordPress and install and adjust the settings as you like. In this example, I have changed the default Installation URL to remove "/wordpress" from my site's URL, and I have picked a WordPress admin account and password.
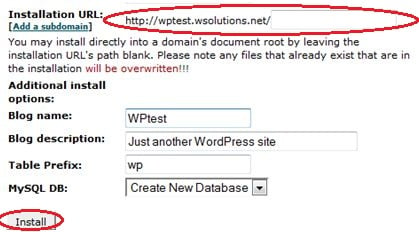
**** Write down your WP Admin account and password. You will need this later! ****
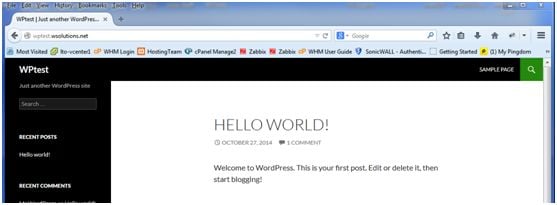
We will now verify that the temp site loads on cPanel. The main goal we want from this step is to verify that the site loads with the proper DNS. If you are not able to access the site via DNS (by typing the site’s URL into the browser’s address bar), you can try using the IP address until DNS replicates the proper changes.
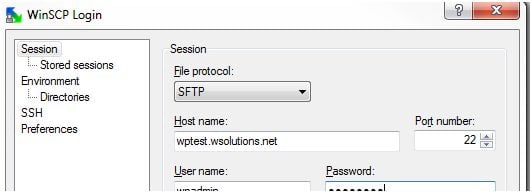
Now, let’s restore our site files from the backup we created earler. You will want to use SCP or FTP to copy your backup file to the server. In this example, I will use WinSCP to complete this task.
The reason we wanted to pre-install WordPress on cPanel is so that all the proper files are updated for our virtual directory, DNS zones, and other miscellaneous settings that happen in the background. Secondly, cPanel will automatically install WordPress in the proper folder under your Home directory (/home/your account name/public_html/), which is probably a different path from your current install if you have migrated from a typical LAMP or XAMPP stack.
In this example, I will be restoring all files to /home/wpadmin/public_html/*
Here is the current folder content from the new install:

I am simply going to remove all files and folders.
*** If you need or require the /cgi-bin, you can keep this folder ***

Now copy the site files and folders from the backup to /home/your account name/public_html/*
Restore the WordPress Database:
To restore the database, you will need the credentials you used when you loaded WordPress in cPanel. These credentials should have been sent to the email address you entered when creating the account, and hopefully you have also written them down as instructed.
Before we start, let’s log in to MySQL and verify the current database name from the new install, which we will need for the MySQL restore command.
Type mysql –p
(Enter the password for the account you defined when you installed WordPress in cPanel)

To List current Databases, type show databases; (note the database name that includes “_wp”)
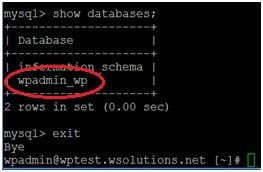
Type exit to end the MySQL session.
Write down the name of your database. In this example, the database is called wpadmin_wp.
To restore your database to the current database called wpadmin_wp, navigate to the folder with your backup files, locate your backup database file (it should end with .sql), and type the following, substituting the name of your database in the proper location.

As in the previous step, this process will prompt you for your database account password. Enter your password and the database restore will complete.
Update your configuration file:
The last step needed to complete the migration is to update the database info in the WordPress PHP config file located in /home/wpadmin/public_html/wp-config.php to use the current database. In my example, I went from using a database called “wptest” to one called “wpadmin_wp” which had a different password.
The previous config file contained the following information:
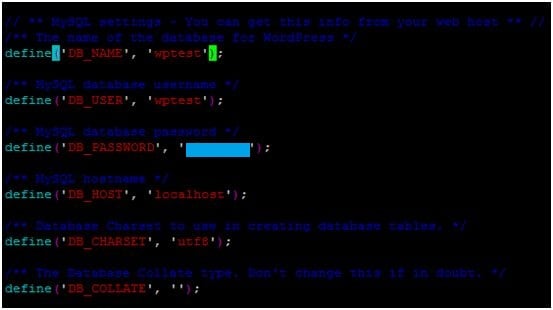
And the new file contains the new database name, user name, and password:
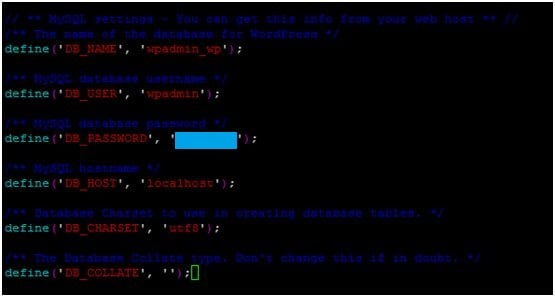
Names and Databases may vary on your install; just substitute the proper name and password for your installation.
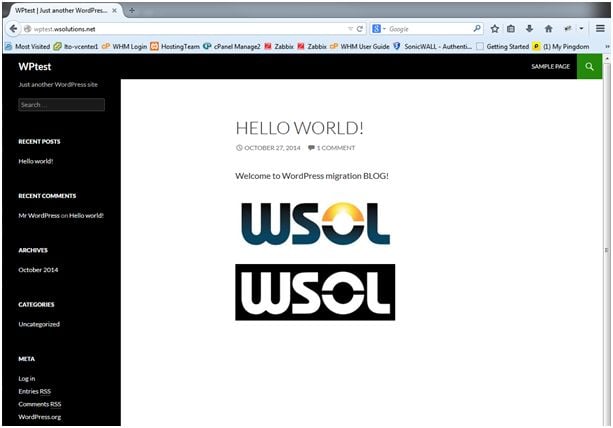
To verify things are working, go back to your cPanel URL and refresh.
Voila! Your site has now been restored to the new server. You’ll need to make sure any DNS references to the old site has have been removed from your current DNS provider or updated to reflect your new IP address and site name.
Do you have any questions about WordPress/Linux hosting? Please contact us to speak to a Solutions Engineer.
Migrating your website? Check out our free e-book on content migration:
Related Posts
7-Step Guide to Effective Social Media Ads
We share how to plan a successful paid social media campaign in 7 easy steps.
Website Content Migration and Knowing What to Keep
With website migrations not all content should be moved. Here are the first critical steps to begin analyzing your content prior to migration.
Results Matter.
We design creative digital solutions that grow your business, strengthen your brand and engage your audience. Our team blends creativity with insights, analytics and technology to deliver beauty, function, accessibility and most of all, ROI. Do you have a project you want to discuss?
Like what you read?
Subscribe to our blog "Diagram Views" for the latest trends in web design, inbound marketing and mobile strategy.

